News

Setup
My RC10 GT
Pictures
My Pics
Submitted Pics
Race Pictures
Movies
Links
Guestbook
Sign Guest Book
View Guest Book
Contact

|
|
My
RC10GT
Click thumbnails for a larger image.
|
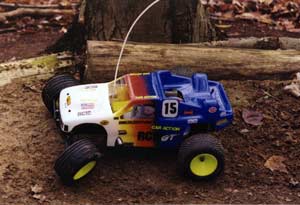
| This is my RC10GT team truck. I purchased
and received the truck late in the summer of 1998. It's pretty sweet; even today. The body is the stock body that came with the
kit. I painted it with my airbrush and did the
detailing, but the window cut-out didn't go as well as
I wanted. I cut a little past the paint line on the upper
side but what can I say... it was the first body I did
with internal openings. I'm not an artist and in no way claim to be, but I think it came out alright despite this. |
 |
 |
 |
|
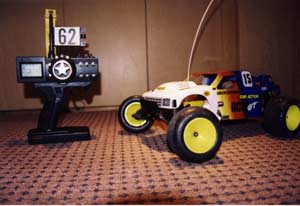
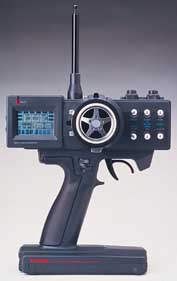
Here is a picture of my car with my radio.
As you can see my radio is a Futaba 3PJ. The radio is
excellent and I love all the functions. I also get about
5 hours of use on Sanyo 700 mah cells I use. All the servos
are Futaba servos. The throttle/brake servo is a standard
servo which, believe me, gives plenty of braking power.
I broke the stock brake disc and hub because I had my
brake on full throw. You do not need a higher torque servo
for these brakes. The steering servo is a 110 oz/in high torgue, high speed standard size servo and
has a transit time of .11. It has more than enough power for this truck and proveds extremely quick steering response. |
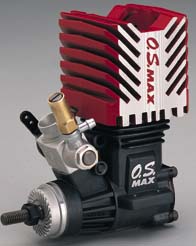
| This is not my actual engine, obviously,
but it is close to the engine I use. The picture is a
picture of the OS .12CV engine. My engine is the OS .12
CV(S). The S mean short shaft. If you don't already know
the RC10GT requires an engine with a shorter shaft. If
the engine you are using does not have a short shaft then
you must cut the shaft. This is explained in the included
video. The OS .12CV(S) is convenient because the shaft
is already shortened for you. If you are new to the hobby
and have not purchased an engine yet, I recommended OS
all the way. I have never had a problem with my engine
nor has my friend who has the pull start model. The engines
idle great and are fast yet stay cool. |
|
 |
Note: When you
start the engine it gets fast then slows down to an idle.
This is normal and probably happens because there is a shortage of fuel in the engine at start up resulting in a
lean mixture initially. You probably won't notice this
until you have reached a leaner needle setting as at richer settings there will be nor shortage. If possible
I recommend you to get the no pull-start model and use
a starter box. Though it is more stuff to carry around,
it makes starting the engine a lot easier. It's extremely convenient during break-in since you don't have
to pull the cord over and over again until you go crazy.
After break-in it's nice because the engine will start faster
since the starter box turns the engine over faster and longer than
a pull starter will.
Also, you don't need to remove the body to start the engine when using a starter box. Now you may say "If my engine stalls, I don't want to
walk all the way over to the car bring it back and start
it on the box again." If you use an OS engine and
follow the instructions, you won't have to worry about
it stalling out. Believe me, this is a very reliable engine.
|
| |
|
|
 |
|
Again, this isn't my actual picture but
it gives you an idea. The radio is pretty tricked out with features. It has the normal extras, like
end point adjustments, which really come in handy when setting up linkages.
It is a lot easier to change endpoints on the radio than to do it mechanically.
One feature it has that may be of interest to beginners is servo speed adjustments. They allow you to artificially slow down the speed of the servos. Beginners might find this useful while starting out because it makes the car less "touchy" to user input. Once you've become a-customed to driving R/C cars you'll want to turn this off to re-gain full speed of the servos. As I mentioned before, my steering servo is high-speed. This is really useful in tight S-curves where you need to turn full steering in one direction then suddenly full steering in the other.
Other features include a switch that
is concealed behind a little door on the back end of the
transmitter that allows you to turn the
transmitter on without it transmitting a signal. This
feature may not seem useful to the casual user, but is if your
in the pits at a race and want to make an adjustment on the radio.
In the pits you are not allowed to transmit a signal unless you're up in the driver's stand driving because may interfere with the racers signals. Also if you
want to adjust the servos in the pit there is a jack in
the back that will allow connection to the receiver without
transmitting a signal. The Futaba 3PJ is a great radio
and I would recommend it to anyone who is racing or just wants the convieniences that only a computer radio can provide.
Update: This model is long discontinued. The current Futaba flagship car radio is the 3PK. |
| Here's a view of the chassis and my actual
engine. The big yellow thing is the dust cover for my reciever. Some sort of dust cover for the reciever is absolutely necessary for off-road vehicles especially in wet conditions. If you don't use a dust cover you will likely ruin the reciever very quickly. A very simple dust cover, and probably the best one, is a latex balloon. After you have hooked up all the wires, slide the reciever down into the balloon then seal off the end with a zip tie. You could even use some silicon sealant in addition to the zip tie to make the cover completely water tight. |
|
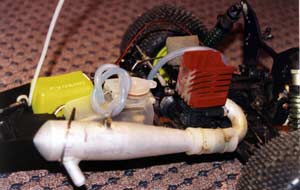 |
One negative aspect to the design of this car is the routing of the wire for the reciever battery. The battery's wire must pass the engines in order to reach the receiver. This could be problematic as the wire could touch the engine causing its insulation to melt and thus causing an electical short. Trying to go around the engine isn't plausible because on one side you risk getting the wires caught in the gears and on the other side you risk hitting the exhaust pipe. The best and pretty much only solution is to route the wire between the engine head and the carbuerator. To be safe you should also wrap the wire with a piece of silicon fuel tubing. You can do this by cutting lengthwise into a piece of fuel tubing a slit, then place the tubing over the wire. Should the wire touch the engine, the tubing will protect it and should not melt at normal engine temperatures. In the photo the wire to the battery is loose. This isn't the case when I run.
The RC10GT includes a tuned pipe in the kit. I decided howver, to use the pipe that came with
the combo I had purchased instead. I'm not sure what
brand it is but I like it a lot better than the Associated pipe. In terms of power it seems the same, but It has a much deeper sound and is quieter than the stock pipe.
|
| |
|
|
 |
|
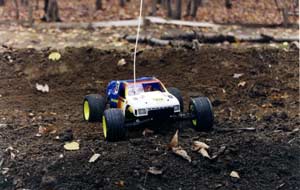
This is a photo of my truck sitting on the end of the table top on my track. This bad boy is ready to role! |
|
|